Friday, June 26, 2015

Friday Focus on Maja Papers!


Hello! It's Nancy here, with a warm welcome to our Friday Focus at the Frilly and Funkie Blog. This week the spotlight is on one of my favorite products, Maja Design Papers! Linda stocks an amazing selection at the Funkie Junkie Boutique, and for the next two weeks she is generously offering an additional 15% off all of the Maja Design papers.


I'm in the process of creating cards for the many wonderful friends and family members who reached out to me during a recent difficult time. This coordinating set of 'thank you' cards turned out to be a perfect way to showcase a variety of Maja Design's gorgeous designs. 


Simplicity is the key with these cards, as the lovely papers stand alone with almost no need for embellishment. I cut, distressed, and stitched papers from Maja Design's Vintage Summer Basics and Vintage Spring Basics collections.   


I added bits of venise lace, two paper flowers, die cut leaves, a scattering of pearls, a twine bow, and a stamped sentiment. The interior of each card is finished with coordinating papers. The blank note card provides ample space for a personal note to each loved one.    
   

Notice how beautifully the papers work together! I'm a frilly girl, so I gravitate toward pastel themes, but Maja designs bolder patterns and color collections as well. 

Maja Design papers are designed and manufactured in Sweden, and they can be very difficult to find. Linda is one of the few shops in the United States to carry their papers. Her her prices are definitely the best, even when they're not on sale.   


It's been great fun sharing my Maja Design addiction with you! Remember to head over to Funkie Junkie Boutique and take advantage of the additional 15% off all Maja Design Papers these next two weeks.  

I send wishes for a joyful summer filled with plenty of crafty fun!

Hugs,  


Wednesday, June 24, 2015

It's Summer!

Hello and welcome to the second week of our Frilly and Funkie challenge! It's Jenny here hosting this one on behalf of my lovely team mate Nancy who I'm pleased to say will be back with us very soon. Nancy's thoughts when setting this challenge had definitely turned to Summer. Here's what she has to say; "Let us know what you love about Summer. Do you enjoy travelling, growing a garden, or laying on the beach? Create a vintage or shabby chic project, card, or layout showcasing what you enjoy most about this wonderful season."

The winner will earn the chance of a Guest DT spot here at Frilly and Funkie, and everyone who enters and follows the rules will be entered into the draw to have the chance to win a $25 spending spree at The Funkie Junkie Boutique. AND, we are pleased to announce that we are introducing new Top 3 Badges because choosing just one overall DT winner has become so hard!

The guidelines for entering are simple and we need you to follow them: create a new vintage themed or shabby chic project following the challenge theme, link it below to your post (not just your blog) and also include a link back to this challenge in your post. You can combine our challenge with up to 10 challenges (including this one) to be in with a chance of winning. If you are entering through a public forum please use keyword F&F. Also, please be sure to turn off your Word Verification so our Design Team can leave comments on your blogs.

For this second week let's see what the Funkie side of the Design Team are offering up as some inspiration (click on each image for a closer look);

Nicole Wright - Canadian Nickel Scrap'n

Sue Carrington - Stamping Sue Style

Jenny Marples - Pushing The Right Buttons

Linda Coughlin - The Funkie Junkie


**********************************************
WEEK ONE

We started the first week with the Frilly side of the Design Team offering up some inspiration (click on each image for a closer look);

Pamellia Johnson - My Little Craft Things

Georgie Connelly - Little Blue Craft Box

Cec Wintonyk - CW Card Creations

Linda Coughlin - The Funkie Junkie


Now it's time to let your mind drift to thoughts of all you love about Summer and start creating. Each and every one of you is important to us. As a team we are constantly inspired by your work and are so excited to see the lovely entries this new challenge will bring.

And as we come to the end of this term for the Frilly and Funkie Design Team we are sad to say goodbye to team member Nicole; she is moving on to pastures new having been with us since the end of last year. Linda, myself and the whole team want to thank Nicole for all her hard work, enthusiasm and gorgeous projects along the way, and wish her every success in the future.

We'll be back on Friday June 26th with a new Friday Focus so please come back for that. Thank you so much for joining us here at the Frilly and Funkie Challenge Blog!

Hugs,
Jenny


Monday, June 22, 2015

Challenge Winners - Monochromatic

Welcome to the Frilly and Funkie challenge blog for the start of a new week, and it's time to announce the winners of the 'Monochromatic' challenge. Thank you so much to everyone who took the time to enter with your beautiful projects. As ever we were spoiled for choice when picking the winner. In the end the Design Team voted for #9 Mona Pendleton!


The textures and depth of colour on this wonderful monochromatic card are simply outstanding when combined with Mona's choice of embellishments. Congratulations Mona on being our favourite for the 'Monochromatic' challenge and winning the opportunity to be a Guest Designer here at Frilly and Funkie for a future challenge.

And now, as mentioned briefly in the latest challenge post HERE, we are introducing new Frilly and Funkie Top 3 Badges because choosing just one DT favourite has become so hard! Our inaugural Top 3 badge winners are... #3 Samra, #6 Julie and #24 Amanda!!! Please email Linda at thefunkiejunkie@gmail.com for the codes for the Top 3 badges so that you can display them proudly on your blog.

And finally Random.org has chosen a winner for our $25 gift certificate to The Funkie Junkie Boutique. Our congratulations this time go to #16 Jennifer H!


A huge thanks from the Frilly and Funkie team to everyone who took part in this challenge and congratulations again to our winners. Please email Linda at thefunkiejunkie@gmail.com for the codes for the winner's badge and to give us your email address for the Guest Designer details (Mona) for the Top 3 badges (Samra, Julie and Amanda) and for the gift certificate details (Jennifer).

Our current challenge, 'It's Summer!', runs through Tuesday, June 30th. We hope to see you entering this time around so that you too can be in with a chance to win. And please make sure you follow our rules; you can enter up to 10 challenges including ours, and a maximum of 3 entries per person to our challenge. Please remember to link back to our challenge in your entry and mention in your post that you are entering this Frilly and Funkie challenge.

Have a great week everyone!

Saturday, June 20, 2015

Saturday Step X Step - Altered Notebook

Welcome to another Saturday Step X Step.  It's Cec here and today I am going to share an altered notebook with you.  The idea behind this was inspired by the items in a little thank you bag of goodies that I received from Linda with my last order.

This is something special that always comes from The Funkie Junkie Boutique and they put coordinating themed items in these little gift packets so you can make a project with them - this one was butterflies.  


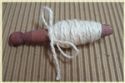
This is the finished project and if you read down, you can see how it all came about.


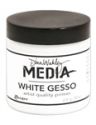
I started with a 5" x 7" notebook that I picked up at the dollar store.  I began by taking the covers off and giving them a coat of Gesso on both sides.


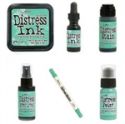
Next I took some Red Geranium Archival Ink and sponged it on and then gave it some splatters with rubbing alcohol, which in the end turned out be a waste of time because I just covered them up anyway but that's OK - we all do it.  I also inked it with some Scattered Straw Distress Ink but forgot to take a photo of that.


The next step was to crumble up some tissue paper, undo it and glue it to the covers.  For each cover, I added tissue on one side, let it dry and then trimmed it around the edges before I added the tissue on the other side. 


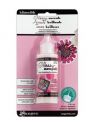
Next I spritzed each side with some Cherry Pie Dylusions Spray Ink.  I was disappointed to discover that it looked bright pink rather the red I expected so I had to change course a bit.  Once the ink was dry, I dry brushed a light coat of Gesso on each side of each cover in order to knock back the colour a bit.


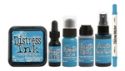
Because the distress ink was too light after I knocked back the colour, I reapplied it and this time I remembered to take a photo.


I got out my ever present natural sea sponge (best craft room tool ever) and dabbed some Dark Scarlet Deco Art acrylic paint randomly on each side - now I have RED.

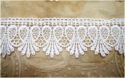
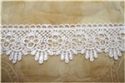
Next I started to prepare the elements I was going to use to decorate the front cover with.  First I used some Scattered Straw DI to dye some venise lace and set it aside to dry.


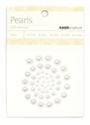
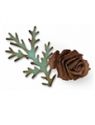
One of the goodies in the bag was this corrugated butterfly so I altered the colour by painting it with Fired Brick and Scattered Straw Distress Ink using a water brush.  I have discovered that the layers have a tendency to separate if you get this white corrugated cardboard too wet but not a problem - I just glued the layers back together.  Once it was dry I added some red pearl stickers to make a body


I took a white paper rose and dyed it with Red Geranium Archival Ink using a paint brush and some rubbing alcohol.  I used some Fired Brick DI to paint a little butterfly I made from crafter's clay and a silicon mold and then added some Holly Red Stickles to give it some shimmer.

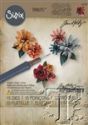
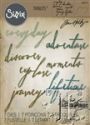
Next I put everything together starting with the gorgeous plaid ribbon topped by the dyed lace.  The vintage ephemera, which came from the goodie bag was distressed and torn before I added it.  I tucked some seed beads where it was torn.  Next I added a piece of red burlap and topped it with the corrugated butterfly, a large red daisy from my stash topped with the dyed rose, the butterfly button from the goodie bag and a button from my stash.  Finally I added the tiny butterfly along with a few sequins that I picked up from the dollar store.

I think my dollar store notebook looks much better now and I hope you are inspired to alter one too.  This would make a super gift for someone special.

Now customers of The Funkie Junkie can share their projects made from their thank you gifts on our Pinterest board.  Here is the link to the Pinterest board so I hope you will take your packet of goodies, create something wonderful and share it so everyone can see.

The following items used to create this project came from The Funkie Junkie Boutique - great customer service, great prices and little gifts too:

Thursday, June 18, 2015

Welcome to today's Guest Designer, Ingrid !

Today we are welcoming Ingrid of Ingrid's Crafts Corner as today's Guest Designer. Ingrid was chosen by the DT as the winner of the 'Happy, Happy, Happy' challenge. Let's move on to hear from Ingrid !


I'm Ingrid Kristina V; a card-maker, an amateur yet enthusiastic artist and an explorer of all artistic :) If you visit my blog you will find anything from cards, journalling, fun tutorials, results of my experiments and wild ideas, but mainly mixed media projects. I love creating abstract art and mixed media is my most go to when I create. There is nothing more satisfying that creating various textures and patterns and adding colour with a dash of grunge. I tend to create rather organic patterns and love using anything naturally aged. Fabric and other materials are so much fun too! I also run a mixed media challenge blog and am a Designer for UK craft magazine Simply Cards and Papercraft.


I got very excited when I found out what the theme was. Summer is my favourite season. I love the warmth, the sun and the sea, the summer holidays, I love how everything comes alive and sparkles and shines... what on earth I am doing in London I have no idea... I would love to live somewhere warm. My card is very much inspired by summer seaside holidays... when I think of summer holidays I think of our house in the Long Island, Bahamas, the gorgeous white sands, shells and sparkly turquoise sea... the sea shells on this card were found in the sand on Long Island.


I do hope you like the card. I shall look forward to reading your comments for sure and can't wait to see what you will make for this fabulous challenge! A big thank you to Linda, Sue and the oh-so talented team for inviting me to share my project here with you today! I’m very honoured indeed!

Have a wonderful day!
Ingrid xxx

I'm sure you'll all agree that Ingrid's card is fantastic! What beautiful colours! If you too would like to be in with the chance to join us as Guest Designer then you'll need to join in with the current challenge 'It's Summer'.

Friday, June 12, 2015

Friday Focus - Texture Fades

It's Friday and that means I (Nicole) get to do this week's Friday Focus and this time we are featuring Sizzix Texture Fades. A Friday Focus is our opportunity to take turns at finding out more about using a specific product or range currently available in The Funkie Junkie Boutique. Bonus, the product has an extra 15% discount added for the next two weeks!

Here's a collection of my own Texture Fades. Last year Sizzix introduced the steel rolled die and matching embossing folder, making your dies even more versatile.


Getting started with a variety of distress paints for the background. Dab and mist.


I used regular cream card stock and dragged it though. Don't waste the left over paint. Drag through another piece of paper and use it later, or ink up some crinkle ribbon. 


I used the Rays Texture Fade, but any one will do great!


To help pop the embossing add some distress inks.


Time for the Layered Dragon Fly. I used watercolor paper and clear acetate.


Run your watercolor paper through your die cutting machine with the die. Then place it on the Texture Fade and run it through again.


See, now this dragonfly comes to life.


I cut a small stripe of acetate for just the wings. Once cut with the die I trimmed off the extra bits leaving me with the wings only. You can run this through with the Texture Fade too.


Now to ink the dragon fly up.  For this I used Mermaid Lagoon and Cracked Pistachio Distress Markers.


Highlighting the veins with the Distress Markers really shows the embossing off.


If you go back again you can get a more intense color!


At this time you can add the acetate wings and attach with a tiny attacher.


Time for some embellishments. I went to my flower jar.


An assortment of flowers including the Tiny Tattered Floral's and some Idea-ology spinners to embellish.


Who loves the Hand Written Thinlits... ME!!!  


These Thinlits are a great way to add a sentiment over texture fades without covering the embossing like you would if you stamped.


Pull it all together and you have a dynamic card full of color and texture!


I love how the acetate wings adds dimension. You can ink your Texture Fades and run your project through. For acetate you would need Memento or Stazon on and I didn't want to mess up my Texture Fade up.


I love using the Tiny Tattered Floral's as greenery accents.


Look how the Texture Fade Rays pop with added color.  


Using Texture Fades for making your own background is a great way to coordinate your project. It adds so much texture. With Texture Fades you can add dimension to your dies, background, you can ink them and your paper. The creative possibilities are endless. And with an extra 15% discount applied at The Funkie Junkie Boutique for the next two weeks it's a great time to add to your own collection.

Thanks for stopping by.