Wednesday, April 29, 2015

Stencil Mania!

Hello! It's Sue here and I'm back as your host for the second week of the current challenge. Now if you know me, you'll know that stencils are a huge part of my crafting style; in fact I don't know what I would do if I couldn't use a stencil! So for this challenge we want to see your stencils taking centre stage, and the more you use the better!

The guidelines for entering are; create a vintage or shabby chic project following the challenge theme, link it below to your post (not just your blog) and also include a link back to this challenge in your post. You can combine our challenge with up to 10 challenges (including this one) to be in with a chance of winning. Make sure you follow these rules as unfortunately we have had to eliminate entrants from the prize draws in the past when they have entered too many other challenges. If you are entering through a public forum please use keyword F&F. Also, please be sure to turn off your Word Verification so our Design Team can leave comments on your blogs.

The winner will earn a Guest DT spot here at Frilly and Funkie, and everyone who enters will be entered into the draw to have the chance to win a $25 spending spree at The Funkie Junkie Boutique.

The Funkie side of the Design Team have created some amazing projects to inspire you and get you reaching for your  stencils again! Click on each of the projects for a closer look:


******************************************************************
WEEK ONE

The Frilly side of the Design Team have created some fabulous projects to inspire you and get you reaching for your stencils!  Click on each of the projects for a closer look:


Linda Coughlin - The Funkie Junkie

So, now it's over to you! Looking forward to seeing what you do!

Sue


Monday, April 27, 2015

Challenge Winners - Spring Time Die Cuts

Welcome to the Frilly and Funkie challenge blog for the start of a new week, and it's time to announce the winners of the 'Spring Time Die Cuts' challenge. Thank you so much to everyone who took the time to enter. There were so many amazing creations and we were really spoiled for choice when picking the winner. In the end the Design Team voted for #11 Graciellie Design.


What a treat this shabby chic card is, really making fantastic use of all those die cuts to celebrate the arrival of Spring. Congratulations Graciellie on being our favourite for the 'Spring Time Die Cuts' challenge and winning the opportunity to be a Guest Designer here at Frilly and Funkie for a future challenge.

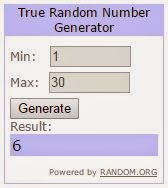
And Random.org has chosen a winner for our $25 gift certificate to The Funkie Junkie Boutique. Our congratulations this time go to #6 Elizabeth (Shrinking Mimsy).


A huge thanks from the Frilly and Funkie team to everyone who took part in this challenge and congratulations again to our winners. Please email Linda at thefunkiejunkie@gmail.com for the codes for the winner's badge and to give us your email address for the Guest Designer details (Graciellie) and for the gift certificate details (Elizabeth).

Our current challenge, 'Stencil Mania!', runs through Tuesday, May 5th. We hope to see you entering this time around so that you too can be in with a chance to win. And please make sure you follow our rules; you can enter up to 10 challenges including ours, and a maximum of 3 entries per person to our challenge. Please remember to link back to our challenge in your entry and mention in your post that you are entering this Frilly and Funkie challenge.

Have a great week everyone!

Thursday, April 23, 2015

Welcome to today's Guest Designer, Nicola!

Today we are welcoming back Nicola (Paper Profusion) as our Guest Designer. Nicola was chosen by the DT as the winner of the 'Put a Ribbon on It' challenge. Let's move on to hear from Nicola!


Hi, I’m Nicola a.k.a. ‘Paper Profusion’, living in Dublin, Ireland. I'm thrilled to be Guest Designing for the über fabulous Frilly and Funkie challenge once again. I’ve loved handicrafts for as long as I can remember, probably inspired by my Mum who excelled at every single crafting technique out there. From very young I was an avid knitter and always enjoyed learning crafts especially ones involving paper. I’m now medically retired however during my ‘career / good health years’ my main creative hobby was photography especially travel/wildlife related. During a time of serious illness, I became hooked on paper crafting as it gave me an outlet to a home based hobby that I could dabble in, at my own pace. I’m particularly drawn to the vintage / shabby chic genres usually adding lots of embellishments and ribbon.


I was so pleased when Sue told me 'Stencil Mania!' was the theme to work with as I love using stencils to add texture and dimension. Only problem was choosing which ones to include on my card today that shows a little Springtime scene.

For the window 'pane' I applied texture paste through a Wendy Vecchi 'vintage quilt' stencil onto heat resistant acetate. Using the technique outlined by Tim Holtz in his March tag I magically turned the paste silver for a faux 'leaded window' effect. I then used Tim's gothic stencil for the pattern on the window blind by just blending distress ink through the stencil. I've also applied paste through Tim's latticework stencil and a Memory box 'tessatina' stencil to add extra background interest. Once dry, I lightly dabbed a variety of distress inks over the raised paste to add colour and then went and covered most of it up with window and fence diecuts!

Thank-you so much to all at Frilly & Funkie for allowing me feature today as Guest Designer. It’s always a privilege to be associated with this wonderful challenge and one of my very favourite design teams.

I'm sure you'll agree that Nicola's project is beautiful and has most definitely provided lots more inspiration for the current challenge 'Stencil Mania'.

If you would like to join us as Guest Designer too you'll have to join in with our challenge!


Friday, April 17, 2015

Friday Focus - Kaisercraft Wood Flourishes

Hello Everyone! It's Pamellia, and I am here today to hostess the Friday Focus. I will be working with some fabulous wood flourishes from Kaisercraft, one of the wonderful new product lines that Linda is carrying in The Funkie Junkie Boutique. For the next two weeks there will be an additional 15% discount on the Kaisercraft Wood Flourishes.


I decided to do something fun and vibrant for the spring season, so I chose some fabulous flourishes that I could build a scene with. The Funky Butterflies, Twin Lamp Post and Small Leaves.


For the lamp post; I covered pieces of it with Glossy Accents and Pumice Stone Distress Glitter to give it some texture. I covered the entire thing with Black Soot Distress Paint and then lightly dabbed on some Distress Paints Weathered Wood, Picket Fence and Brushed Pewter.


For the first butterfly, I painted it with Picket Fence and then used the Tim Holtz Gothic stencil and some texture paste to lay down a pattern. I covered the paste with Ranger clear embossing powder to act as a resist. Once it was dried and heated, I sprayed it with Dusty Concord and Picked Raspberry Distress Ink Sprays.


For the second butterfly, I painted it with Dusty Concord and Picked Raspberry (which I forgot to take a picture of) then used some watered down Picket Fence to white wash it. A coating of Rock Candy Crackle Paint and then a dribble of Dusty Concord and Picked Raspberry sprays into the cracks.


For the last butterfly, I coated it with Picket Fence Crackle Paint and then used Distress Ink Pads Dusty Concord and Picked Raspberry to lightly colour the surface.


For the leaves, I used some Peeled Paint Distress Paint and some Wendy Vecchi Fern Green embossing powder to partially cover the leaves. Then I sprayed them with Walnut Stain Distress Stain, for a little distress leafy look.


I added some Tim Holtz/Sizzix Trellis die cuts in the back painted with Picket Fence paint and streaked with Black Soot ink right from the pad. Some beautiful Melissa Francis pearls adorn the bodies of the butterflies.


The Celebrate Stamp is from the new Graphic 45 line Time To Flourish. I added the "SPRING" with an alphabet stamp set. The flower is cut using the Tim Holtz Tattered Florals die and the seam binding was also coloured with Dusty Concord and Picked Raspberry.


I hope you enjoyed my techniques on how to make beautiful embellishment with these fabulous Kaisercraft Flourishes. They can take a lot of products and never warp and they add so much dimension to any project that you may make. You can even used them completely as is for a more earthy, natural look.

All of the below products can be found at The Funkie Junkie Boutique and don't forget that all the Kaisercraft Wood Flourishes will have an extra 15% discount applied for the next two weeks.

Happy crafting, Pamellia :)

Wednesday, April 15, 2015

Spring Time Die Cuts

Well hello Spring! Time to get your crafting geared away from Winter and into Spring! Nicole here to host this awesome Springtime Die Cut Challenge. I'm sure there's some foliage, flowers or butterflies somewhere in your stash! Just think SPRING!

The guidelines for entering are; create a vintage or shabby chic project following the challenge theme, link it below to your post (not just your blog) and also include a link back to this challenge in your post. You can combine our challenge with up to 10 challenges (including this one) to be in with a chance of winning. Make sure you follow these rules as unfortunately we have had to eliminate entrants from the prize draws in the past when they have entered too many other challenges. If you are entering through a public forum please use keyword F&F. Also, please be sure to turn off your Word Verification so our Design Team can leave comments on your blogs.

The winner will earn a Guest DT spot here at Frilly and Funkie, and everyone who enters will be entered into the draw to have the chance to win a $25 spending spree at The Funkie Junkie Boutique.

Our Week Two inspiration comes from the wonderful Funkie side of the Design Team. Click on each of the projects for a closer look;


Sue Carrington - Stamping Sue Style

Linda Coughlin - The Funkie Junkie


************************************************
WEEK ONE

Our Week One inspiration comes from the amazing Frilly side of the Design Team. Click on each of the projects for a closer look;


Linda Coughlin - The Funkie Junkie


Now it's your turn to show us what you can do with your Springtime die cuts in that vintage or shabby chic style. Looking forward to seeing what you come up with.

Get Inky,
Nicole

Monday, April 13, 2015

Challenge Winners - Put a Ribbon on It!

Welcome to the Frilly and Funkie challenge blog for the start of a new week, and it's time to announce the winners of the 'Put a Ribbon on It!' challenge. Thank you so much to everyone who took the time to enter with your amazing projects. There were lots of fabulous creations sporting ribbon in many different ways. Unfortunately we had a few entries that had to be discounted because they didn't follow the rules (a lack of actual ribbon and entering more than 10 challenges) which is such a shame.

However, from those that were left the Design Team were really spoiled for choice and it was an extremely close run thing in the end. Finally our winner was picked as #40 Paper Profusion (Nicola).


If you haven't yet seen Nicola's gorgeous 'box' then we highly recommend you hop on over to her blog to take a closer look as this one photo really doesn't do it complete justice. If you think the top and sides are beautiful you should see the inside!... Congratulations Nicola on being our favourite for the 'Put a Ribbon on It!' challenge and winning the opportunity to be a Guest Designer here at Frilly and Funkie for a future challenge.

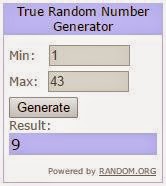
And Random.org has chosen a winner for our $25 gift certificate to The Funkie Junkie Boutique. Our congratulations this time go to #9 Kimberly Cobb.


A huge thanks from the Frilly and Funkie team to everyone who took part in this challenge and congratulations again to our winners. Please email Linda at thefunkiejunkie@gmail.com for the codes for the winner's badge and to give us your email address for the Guest Designer details (Nicola) and for the gift certificate details (Kimberly).

Our current challenge, 'Springtime Die Cuts', runs through Tuesday, April 21st. We hope to see you entering this time around so that you too can be in with a chance to win. And please make sure you follow our rules; you can enter up to 10 challenges including ours, and a maximum of 3 entries per person to our challenge. Please remember to link back to our challenge in your entry and mention in your post that you are entering this Frilly and Funkie challenge.

Have a great week everyone!

Saturday, April 11, 2015

Saturday Step By Step - Playing With Lindy's

Hi everyone, and welcome to my first Saturday Step By Step!! Eeeek, a little nervous haha :)

For this SxS I will be showing how to create a ‘distressed' background with Lindy’s using glue. I know there are some tutorials for this, but only using PVA based glues with Distress Inks. I wanted to show how you can do this with Glossy Accents, PVA based glues and, of course, Lindy’s!! If you want a closer look at any of the photos just click on them.


First off gather your supplies…


For this I used the Autumn Leaves Lindy’s set, these are gorgeous, shimmery, rich, warm colours. Drool!!

I took a Ranger Size 8 Manilla Tag but you can do this on anything and used the Brown, Blue and Green from the set. Allow for a good covering and let it dry. If you want, before it dries, you can water it down or create drips using a mister. You can either let it dry naturally or speed up the process with a heat tool.


I’ve used two different types of glues, a PVA style glue and Glossy Accents.


Dab some glue on randomly.


Smear it around - yep…. you get very messy at this stage :)

Let it dry. I prefer at this stage to let PVA glue to dry naturally as you can be left with a whitish sheen if you heat dry, but Glossy Accents is fine to speed up.


When dry, spray back over with the same colours. Let it pool and drip, and do what it does best :) Give it 30 seconds to a minute and go in with a paper towel to mop up the paint that is on the glue areas.

(Can you see the glue acting as a resist? Neat huh!)

(Tried to capture the shimmer as best as possible with this one)

Here are some close ups of each tag;

PVA style glue

Glossy Accents

Next, stamp a background image; I find Archival ink best for this. I used the background text from Tim Holtz’s Papillon set and just watched as the ink sinks in to the shimmer, and then notice the text really pops and shines on the glossy parts.

This picture is the Glossy Accents one, this is my favourite because of how it really creates a huge difference between the two different areas.


Now you’re ready to decorate however you’d like... I had another go at the technique Tim used for March with the texture paste and embossing powder, using Lindy’s Autumn Leaves Embossing Powder set - Terra Cotta Rust and Nantucket Pearls - Golden Angel Wings.


Then decorated, ready for an occasion, using Tim Holtz Idea-ology Mirrored Stars, Small Talk Sticker and a Muse Token. Finished up with some little dots of Liquid Pearls in Rose Gold.


Hope you enjoyed today’s post and do check out the gorgeous and vast range of Lindy’s Stamp Gang products now being sold at The Funkie Junkie Boutique. They are drool-worthy :)

Huge hugs,
Georgie xx