

Happy Friday Frilly and Funkie friends, it's Linda with this week's Friday Focus. If you've been over to The Funkie Junkie Boutique recently, you will know that I have stocked up on lots and lots of Wendy Vecchi goodies including the new stamp sets, the Stamp It Stencil It sets, stencils, new archival inks and reinkers and all those yummy embossing pastes. This week, we're doing the Friday Focus on Wendy Vecchi stamps and stencils. That means all those products, including the new SiSis, are all 15% off our already discounted prices. Check out the Friday Focus tab at the boutique to see all the great products on sale.

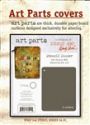
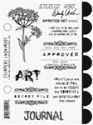
A couple of new Art Parts products that Wendy Vecchi introduced this season were the binders for her stamps, stencils and a journal cover. I grabbed one for my stamps and one for my stencils as soon as they came in, but haven't had time to do any artwork on them so this tutorial was a great chance for me to get out my stencils, embossing pastes and inks. I haven't used these products a lot so this was basically a play session, experimenting with some techniques. I had some success and some things that I wish I had done differently and will the next time. I'll point those things out as I go along.
First I decided to see how clear embossing would work under embossing paste (turned out, not so good).

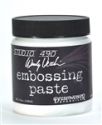
Next, white embossing paste was spread over the Art Parts cover to create a base for the crackle embossing paste to adhere to. I covered the clear embossed flower very thinly with the white embossing paste hoping it would show through.

Next I decided to try some stamping to see how it would look under the crackle paste. I know it's a little tough to stamp on the crackle paste so I thought I would see how it looked under the crackle. (turned out, not so good - again).
Before I move on, I wanted to mention two products here that I really like. One is the Tim Holtz Gridblocks. I started using them a couple of months ago after using the chunkier, heavier acrylic blocks for many years. Also, I ordered these large #3 Jet Black archival ink pads for the boutique by mistake. I thought I was ordering the regular sized ones and was a little upset with myself when they arrived and realized my mistake. But I thought, what the heck, opened one up an started using it. Now I LOVE it. It is great for inking up those larger sized stamps!
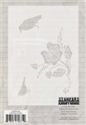
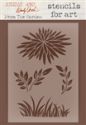
Next I stenciled on more white paste through a stencil to create some leaves.

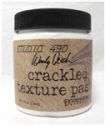
Once the overlay of white past was dry, I slathered on some crackle embossing paste. I put it on fairly thin because I wanted the crackles to be small. I wish I had varied the thickness a bit more, putting it on thicker in some areas.

Once the crackle paste was dry, I inked it with a combination of Potting Soil and Leaf Green archival reinkers mixed with rubbing alcohol.

Once the color was applied, the edges were sponged with Walnut Stain distress ink and the stamping was applied. My clear embossed flower got lost under the crackle paste and color.

I didn't put anything 3-D on the cover because I will be storing it book style on my shelf and I didn't want anything that would pull off or stop it from sliding easily on and off the shelf.

This binder works fantastic for storing my Wendy Vecchi stencils but it also works great for storing the Wendy background stamps!

Thanks for hanging in with me for my learning experience. I hope you were able to take away some valuable tips. Be sure to stop by The Funkie Junkie Boutique and check out our Friday Focus tab to see the sales and also the Wendy Vecchi/Studio 490 tab to take a look at all the Wendy goodies on stock.

Check out these products at The Funkie Junkie Boutique where Wendy Vecchi and most other name brand products are alway 20% below MSRP:
 |  |  |  |  |
 |  |  |  |  |
 |  |  |  |

Fantastic tutorial Linda, love how you've taken us through your learning journey. The colours and the crackle have worked beautifully. Sue C x
ReplyDeleteThanks for this tutorial Linda.Great result!
ReplyDeleteI actually liked it when you had just stencilled the leaves on too as I love black and white on Kraft card.Looks kind of wintery -which it is in the uk at the moment!
Going to try this one with adjustments where I don't have all the products .
XxRuthl
Brilliant result Linda. Thank-you for all the tips. Nicola x
ReplyDeleteLove this and the outcome is beautiful
ReplyDeleteApart from the flower that disappeared this is a truly beautiful piece of work, the colours you did with the re-inkers are fabulous and I love the stamping - thanks so much for sharing this. I hope you don't mind but I would like to pin this! Hugs, Anne x
ReplyDeleteThanks so much, Anne. I'd be honored to have you pin my work!
DeleteI am in love with your cover and binder storage for your stencils and stamps, Linda!! You mentioned you'd do a couple things differently next time, but honestly I wouldn't change one thing about your cover. It is PERFECT!! Trying new ideas to see how they work is one of the most fun parts of the creative process. Thank you so much for all the tips and tricks. I always learn so much from you!!
ReplyDeleteHugs,
Nancy
experimenting is fun!
ReplyDeletethe end result looks just great!