


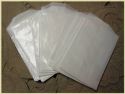
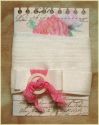
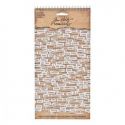
I started with three of the medium glassine bags I sell in the boutique and brushed them lightly with gesso and then randomly stamped them with some vintage style stamps.

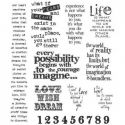
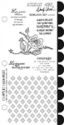
I used Tim Holtz's Fabulous Flourish stamped in black archival and also the text stamp from his Stuff to Say set also stamped in black archival. For the one on the left, I used Wendy Vecchi's script background from Live and Make Art stamped in Coffee archival, then hit them briefly with my heat gun to make sure the ink was good and dry.

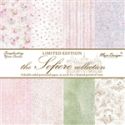
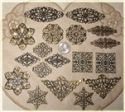
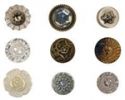
For my first packet, I cut two Tattered Florals die cuts from the Maja Design Sofiero collection (love that yummy chintz style pink pattern) and then topped it off with a round bronze filigree that I altered by applying Weathered White embossing powder.

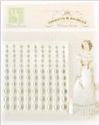
I topped it off with a rhinestone style button and a tiny tag cut from the Sofiero paper. The sentiment stamping was done with the text stamp from Stuff to Say.

For my middle packet, I cut a piece of vintage net (that was given to me by a friend) and frayed the ends with my fingernail, then bunched up the top and tied a piece of shabby seam binding around it in in a bow.

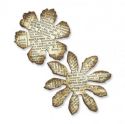
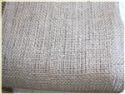
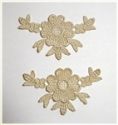
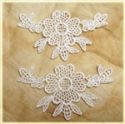
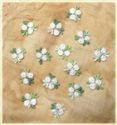
Then I cut a burlap square and added a floral Venise lace applique that I had previously dyed with coffee, then topped it off with a tiny Venise tri-bud applique.

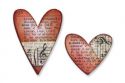
I already had the little heart cut out and kicking around my desk, having made it for a prior project. It was stamped on manila CS with the background stamp from Wendy Vecchi's Heirloom Art set in Coffee archival. I added a sentiment using Tim's Chit Chat stickers and some sticky back pearls from Melissa Frances.

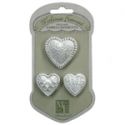
My third packet simply started with a round doily that I sponged with Vintage Photo DI. I added a crinoline flower that I die cut with the Tattered Florals die - 3 layers of the largest flower and 2 layers of the next largest flower. I dunked it in coffee (I keep a small container of boiled down coffee in my 'fridge to use for dying laces and crinoline). The button is from Tim Holtz. I cut the burlap heart free form and added a Melissa Frances resin heart and a Chit Chat sentiment sticker.

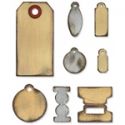
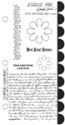
I used library cards to insert inside each to write a message or stamp a sentiment on, cutting the tops of each with the Torn Notebook On the Edge die for the two on the left/middle and the Postage Stamp die for the one on the right.

Then of course I had to grunge them up a bit with Vintage Photo DI and some random stamping with the same sets I used on the envelope, this time stamped in Vintage Photo.
That wraps it up for my StepXStep project for this week. I hope you like them. Thanks so much for dropping by today!
Hugs,
Linda
These products used to create this project can be purchased at The Funkie Junkie Boutique:
 |  |  |  |  |
 |  |  |  |  |
 |  |  |  |  |
 |  |  |  |  |
 |  |  |  |  |
 |  |

Beautifully vintage shabby packets Linda, love the different elements on each one and the cool library card inserts.
ReplyDeleteHugs Brenda xxx
Simply Gorgeous....Thank you for the wonderful tutorial... Hugs May x x x
ReplyDeleteThese ae absolutely gorgeous , love all of them and some great ideas, a really fab tutorial x hugs trace x
ReplyDeleteGreat step by step this week - love these shabby packets, gorgeous
ReplyDeleteBeautiful little packets Linda, love all the different embellishments you've used and the library card insers are fab ! Sue C x
ReplyDeleteLinda, these little packets are simply exquisite! Hugs, Anne x
ReplyDeleteSuch special little gifts Linda. Love the attention to detail on each one. Hugs, Jenny x
ReplyDeleteEach bag is beautiful, Linda.
ReplyDeleteLOVE how you have decorated each one differently :o)
Big Hugs, Candy
Wow Linda........I so love these projects. My mojo is playing up these days and these projects are very inspiring. TFS and best wishes to you
ReplyDeleteAnnie x
WOW! These are great! What a very clever idea and thanks so much for all your clear explanation of how-to! I always enjoy your work but never comment so please keep up the great job! Thanks so much!!
ReplyDeleteYou've done it again! I love these bags. Glassine Bags definitely on my next order. Blessings, Ginger
ReplyDeleteI love these little bags! What a wonderful way to present a card or message. They're great and sooo useful!
ReplyDeleteOh my goodness...what about tucked inside a loved one's bag as they're leaving home for college or a long trip? What about just inside a friend's front door - for no reason at all. They are just stunning and I look forward to creating some of my own very soon. My art space is dismantled at the moment but hopefully in a few days I'll be back up and running.
ReplyDeleteThese are divine Linda! Thank-you so much for step x step. Nicola x
ReplyDeleteSo beautiful!! I love ot!!
ReplyDeleteSooo beautiful
ReplyDeleteLinda,
ReplyDeleteThese are soooo beautiful, now I wish I had added some of those beautiful glassine bags to my order! Oh well, something else for my wish list, . .lol! Thanks for sharing them with us.
Oh my goodness but these are GORGEOUS! The bags alone are lovely, but embellished like this they are just stunning.
ReplyDeleteThey are gorgeous!! Each one looks so special and unique! Love the idea and the way you put them together, they look great!
ReplyDeleteWow, Linda, these are truly stunning! I can't get over how much you were able to do on those little bags. Fabulous!
ReplyDeleteHey there Linda, they are fabulous I love them lots, great tutorial too....stunning sweetie Hugs Terry xxxx
ReplyDeleteJust gorgeous stuff...
ReplyDeleteHave a nice day! :)
These are beautiful - thank you for sharing :)
ReplyDeleteOh dear....just LOVE your tutorial. These small pieces of art are fabolous. Thanks a lot for sharing inspiration.
ReplyDeleteHugs from SPAIN
These are absolutely enchanting, Linda - I love the gesso and stamping on the white glassine - so lovely. And all your embellishing is just perfect... love the filigree with the Weathered White embossing powder. Wonderful step-by-step, and now my fingers are itching to come shopping again!
ReplyDeleteAlison x
Love these. Right up my alley. But they could be done any other style, also. Thanks for the tutorial, and I NEED THESE BAGS, too..
ReplyDeleteΓΕΙΑ ΣΟΥ LINDA!!
ReplyDeleteΣΥΓΧΑΡΗΤΗΡΙΑ ΓΙΑ ΤΟ BLOG ΣΟΥ ΚΑΙ ΓΙΑ ΤΙΣ ΚΑΤΑΠΛΗΚΤΙΚΕΣ ΔΗΜΙΟΥΡΓΙΕΣ ΣΟΥ!!!
ΤΑ Shabby Packets ΤΑ ΕΧΩ ΑΝΕΒΑΣΕΙ ΣΤΟ BLOG ΜΟΥ ΣΤΗΝ ΣΕΛΙΔΑ
Get The Idea ΑΝ ΔΕΝ ΘΕΛΕΙΣ ΑΦΗΣΕ ΜΟΥ ΜΗΝΥΜΑ ΓΙΑ ΝΑ ΤΑ ΑΦΑΙΡΕΣΩ.
ΚΑΛΗΜΕΡΑ ΑΠΟ ΕΛΛΑΔΑ!!!!